
Jump to Recipe
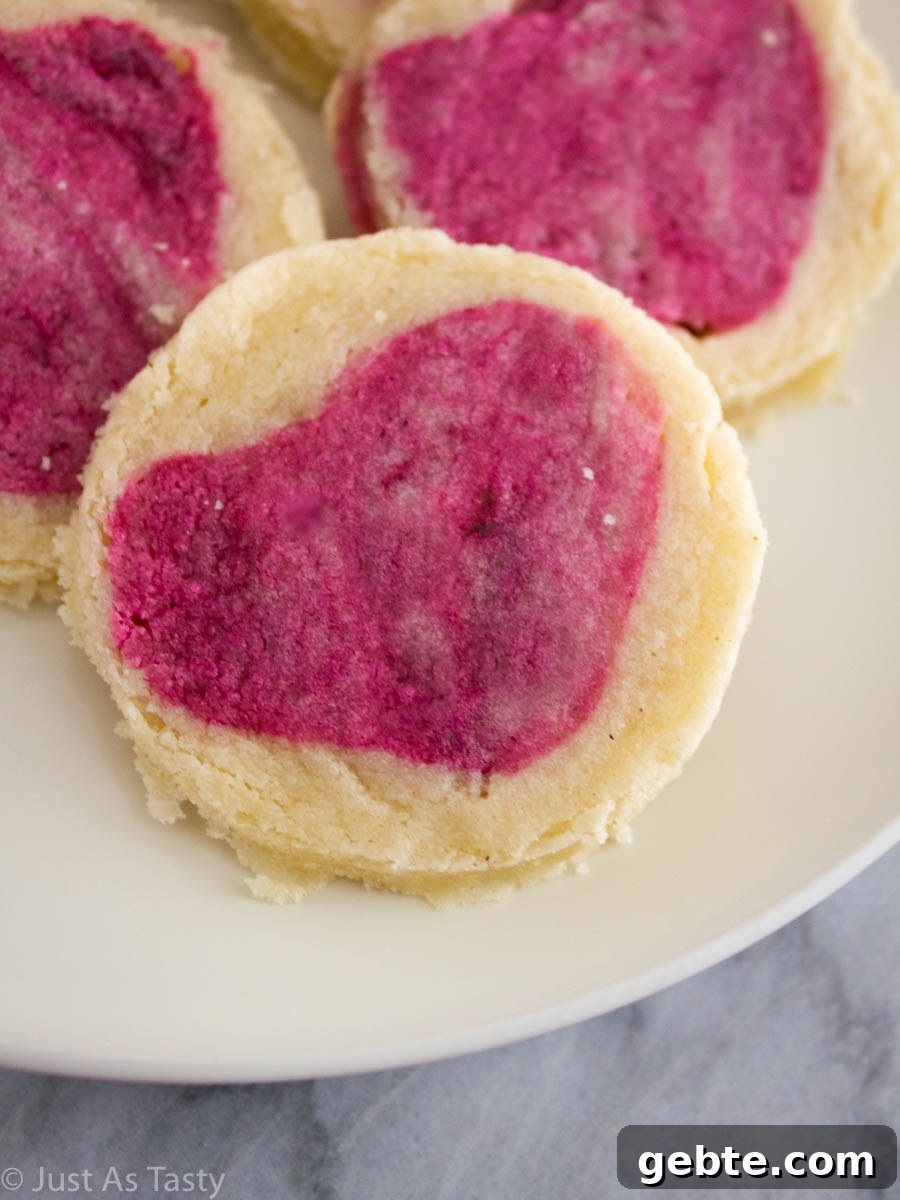
These slice and bake sugar cookies hide a small design in the center for a delightful surprise. They bake up super soft, use just a handful of simple ingredients, and are easy to customize for any holiday or celebration.
Growing up, I remember the excitement of ready-to-bake sugar cookies with festive shapes embedded in them—pumpkins, trees, and snowmen depending on the season. Those little novelty cookies inspired this gluten-free, eggless slice-and-bake version so you can make your own designs at home.
If you’ve wondered how to make sugar cookies with a hidden design in the center, this guide will walk you through every step. The technique is straightforward once you understand the process: tint part of the dough, cut small shapes, stack them, encase the shapes in plain dough, chill, then slice and bake. Read through the recipe and instructions before you begin so you know the order of operations and how to manage the dough as it softens. The same approach works for any shape or color you choose—hearts, stars, letters, or seasonal icons—so feel free to experiment.
For this version I chose a small pink heart in the center to make Valentine cookies, but you can swap colors and cutters to fit Halloween, Christmas, birthdays, or any occasion. The dough is soft and tender thanks to a little cream cheese joined with butter, and the recipe is deliberately simple so you likely already have what you need in your pantry.
Why You’ll Love These Slice And Bake Sugar Cookies…
- They look impressive and playful—perfect for gifting or serving at parties. The hidden design is a charming surprise that never fails to draw compliments.
- These cookies are very soft and tender. The addition of cream cheese helps keep them melt-in-your-mouth while also acting as a binder in this eggless version.
- The ingredient list is short and uses common pantry staples. With a little gel food coloring and a small cutter you can create many variations.
What You’ll Need…
- Dry ingredients: a gluten free flour blend and salt.
- Fat: unsalted butter and a small amount of cream cheese to add richness and tenderness.
- Flavor: granulated sugar and vanilla extract.
- For the design: gel food coloring and a small cookie cutter in the shape you want to embed.
How To Make Slice And Bake Cookies With Designs…
Begin by combining the flour and salt in a bowl and setting them aside. In a separate bowl, cream the room-temperature butter and cream cheese with the sugar until smooth and light. Mix in the vanilla, then gradually add the flour mixture on low speed or fold it in by hand until a cohesive cookie dough forms. Avoid overmixing.
Reserve about one third of the dough and tint that portion with gel food coloring until the color is even and vibrant. Gel coloring gives a richer hue without adding liquid. Transfer the tinted dough to parchment and press or roll it to roughly 1″ thickness. Use a small cookie cutter to cut out shapes from the tinted dough; re-roll the scraps and cut until all tinted dough is used.
Stack the small cut shapes gently one on top of another, then stand the stack on its side to create a small log of shapes. Set that shaped log aside. Roll the remaining plain dough to about 1″ thickness on a clean piece of parchment and slice it into four or five wide strips. Place the colored shape-log on top of one strip and carefully wrap the plain dough strips around the tinted core. Work gently so the stacked shapes remain intact and centered as you encase them. When the colored log is fully covered, wrap the whole dough log tightly in plastic wrap and refrigerate for at least two hours; overnight chilling is ideal for cleaner slices.
When ready to bake, preheat the oven to 350°F (175°C). Unwrap the chilled dough and slice it into 1/2-inch rounds using a sharp knife. Arrange slices on a parchment-lined baking sheet about an inch apart and bake until the edges are set and the centers look just baked, about 10–12 minutes. Let the cookies cool completely on the sheet before transferring to a rack so the design stays neat.
Tips For Getting The Perfect Slice And Bake Sugar Cookies…
- Use room-temperature butter and cream cheese so they cream together smoothly. Measure flour accurately—too much flour yields dry, crumbly cookies. If possible, weigh your flour; otherwise spoon and level when using cups.
- Gel food coloring is recommended for vivid colors without adding extra moisture. It blends into dough better than liquid food coloring and yields stronger hues with less product.
- If the dough becomes too soft while working, chill it for 20–30 minutes after rolling but before cutting shapes. Slightly firmer dough holds small shapes better when stacking and forming the log.
- When assembling, handle the dough gently and try to keep the design pieces aligned. If edges become uneven after baking, while the cookies are still a bit warm you can gently press the rim of a clean glass around each cookie to neaten the round shape.
📖 Recipe

Slice & Bake Sugar Cookies – Gluten Free, Eggless
Ingredients
- 2 cups (296g) gluten free flour blend
- ½ teaspoon salt
- 1 cup (226g) unsalted butter room temperature
- 2 ounces cream cheese room temperature
- 1 cup (200g) granulated sugar
- 1 teaspoon vanilla extract
- gel food coloring
Instructions
-
Whisk the gluten free flour blend and salt together in a medium bowl. Set aside.
-
Cream the butter, cream cheese, and granulated sugar with a hand mixer or stand mixer fitted with the paddle attachment until smooth. Add the vanilla and mix to combine. Gradually add the flour mixture and beat on low until a soft cookie dough forms.
-
Remove roughly one third of the dough and tint it with gel food coloring until you reach the desired shade. Roll the tinted dough on parchment to about 1″ thick and cut small shapes with a tiny cutter, re-rolling scraps as needed.
-
Stack the cut shapes gently, stand the stack on its side to form a small log, and set it aside.
-
Roll the remaining plain dough to about 1″ thickness and slice into 4–5 wide strips. Place the colored log on one strip and wrap the plain dough strips around it until the colored center is fully enclosed. Wrap the completed dough log tightly in plastic and refrigerate at least 2 hours or overnight.
-
Preheat the oven to 350°F. Slice the chilled dough into ½-inch rounds, arrange on a parchment-lined baking sheet about 1″ apart, and bake for 10–12 minutes. Allow cookies to cool completely on the baking sheet before removing.
Notes
- If the dough is too soft to cut and stack easily, chill it for 20–30 minutes after rolling but before cutting shapes; slightly firmer dough is easier to work with.
- Gel food coloring gives deeper, more vibrant colors with less product than liquid food coloring, which can add unwanted moisture.
Did you make these slice and bake sugar cookies? Leave a comment below or tag your photos on social media with #justastastyblog to share your creations.